The Frustrating Reality of Flat AI Art (My Honest Experience)
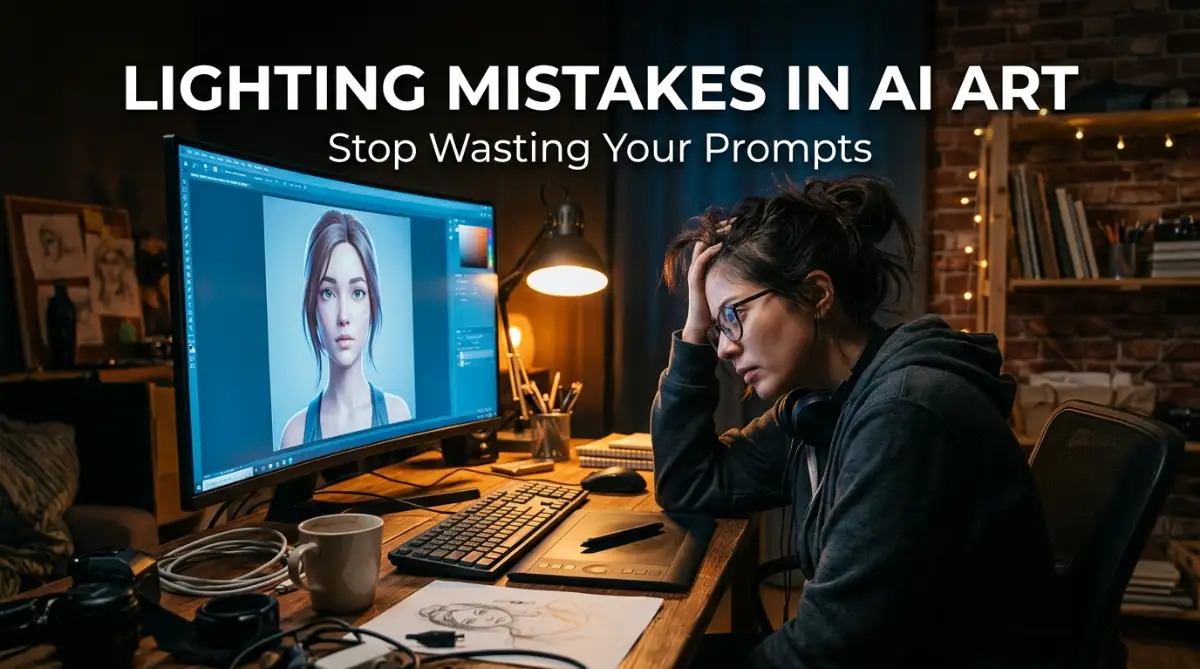
I remember sitting in front of my computer at two in the morning, completely exhausted and ready to throw my keyboard across the room.
I had a beautiful, crystal-clear vision in my head of a moody, cinematic portrait shot in the rain.
But no matter what words I typed into the AI generator, the result looked like a cheap plastic doll bathed in flat hospital lighting.
My daily credit balance was dropping fast, and my frustration was going straight through the roof.
I just could not figure out why the intelligent software was completely ignoring my creative ideas.
It honestly felt like I was speaking a completely different language to a machine that refused to listen.
Every single time I hit the generate button, I held my breath hoping for a masterpiece. Instead, I kept getting these unnaturally bright, glowing faces with zero shadows and zero depth.
This is a struggle I know so many of us face every single day. You spend hours crafting the perfect scene, selecting your characters, and setting the mood. But because the lighting words are slightly off, the entire image falls apart.
It completely ruins your mental peace when you know exactly what you want, but the screen shows you something entirely different. You start doubting your own skills, wondering if you are just bad at writing prompts.
The truth is, describing illumination to a machine requires a very specific approach. Machines do not have eyes, and they do not feel emotions the way we do.
When you get this wrong, you waste hours of your valuable time and burn through expensive subscription credits. The emotional toll of constantly failing to bring your imagination to life can actually kill your motivation to create art.
We often forget that AI models learn from millions of tagged photos on the internet. If you use vague words, the software just grabs the most average, boring lighting setup it can find.
I want to share exactly how I stopped making these painful errors. I will walk you through the exact missteps that are holding your images back right now.
How I Fixed My Prompts: The Science of Digital Illumination
The first thing you need to understand is that AI generators are incredibly literal. They do exactly what you say, not what you mean.
If you want to stop getting those boring, lifeless images, you have to change the way you talk to the machine. You have to start thinking like a real-world photographer setting up a studio.
Let us look at some of the biggest errors people make and how you can fix them starting today.
Relying on Empty Buzzwords Instead of Specifics
One of the most common things people do is type words like "beautiful lighting" or "good lighting" into their prompts.
Think about how incredibly vague that is for a computer. What does "beautiful" even mean to a string of code?
To you, beautiful might mean a soft sunset over the ocean. To the AI, it might mean the bright fluorescent lights inside a shopping mall.
When you use generic buzzwords, you force the AI to guess what you want. And let me tell you, it almost always guesses wrong.
Instead of saying "awesome light," you need to describe the exact source of the illumination. Tell the machine if the light is coming from a candle, a neon sign, or the afternoon sun.
Myth vs Reality in AI Prompts
- The Myth: Adding "cinematic lighting" to the end of a prompt automatically makes it look like a Hollywood movie.
- The Reality: Without a defined light source or color direction, "cinematic" just makes the AI add random blue and orange tints to a flat image.
If you want your artwork to look professional, you must drop the lazy adjectives. Start using actual photography terms that describe the quality of the light.
Words like "softbox," "diffused," or "harsh spotlight" give the generator clear mathematical instructions. This small shift in your vocabulary will instantly improve the depth of your images.
Mixing Contradictory Times of Day
Another huge mistake I see all the time is mixing up different environmental keywords.
You might tell the AI you want a "midnight street scene" but also ask for "golden hour sunlight."
The machine gets completely confused. It tries to blend the dark blue tones of midnight with the bright orange rays of a sunset.
The result is usually a messy, washed-out picture with strange gray skies and glowing objects that make no logical sense. You have to pick a single time of day and stick to it throughout your entire description.
If you want a night scene, describe the moon or the street lamps. If you want a morning scene, ask for early morning mist and soft sunrise rays.
Keeping your environmental variables consistent is extremely important for a realistic outcome. The AI needs a solid foundation to build the lighting engine around your subject.
Ignoring the Direction of the Sun or Source
Imagine walking into a dark room and turning on a flashlight. Where you point that flashlight completely changes how the room looks.
If you point it straight at your friend's face, they look flat and bright. If you hold it under their chin, they look like a monster from a horror movie.
Pro Tip: I remember I used to just type 'dramatic lighting' on every single prompt, hoping the AI would do the heavy lifting for me. But I quickly realized that without specifying a light direction, the AI just slaps a generic dark filter over the image, completely ruining the details of my main character.
You have to tell the software exactly where the light is coming from. Are the rays hitting the subject from behind, from the side, or from above?
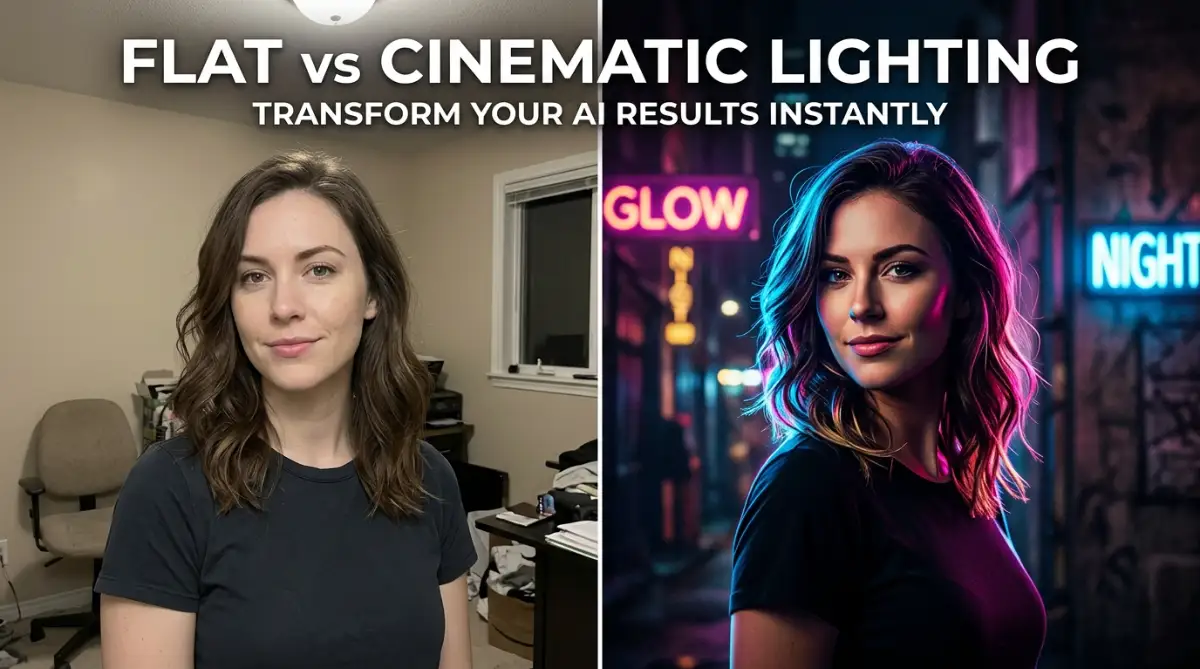
If you do not specify a direction, the AI usually defaults to flat frontal lighting. This is why so many AI portraits look like they were taken with a cheap mobile phone flash.
Using terms like "backlit," "side illumination," or "top-down lighting" forces the machine to calculate highlights and shadows properly.
Stop Getting Flat AI Portraits Instantly
Forgetting the Power of Deep Shadows
Light cannot exist without darkness. This is a basic rule of physics, yet so many people completely forget about shadows when writing prompts.
People are so obsessed with making everything bright and visible that they tell the AI to illuminate every single corner of the image.
When you remove the shadows, you remove the three-dimensional feel of the picture. The image becomes flat, just like a drawing on a piece of paper.
Shadows are what give objects their shape and texture. They tell our brains how deep or round an object is in the real world.
If you want a moody, realistic picture, you have to invite the darkness in. Do not be afraid to use words like "deep shadows," "high contrast," or "chiaroscuro."
These descriptive words tell the software to let certain parts of the image fade into black. This creates a sense of mystery and makes the bright areas stand out even more.
If you look at any professional photograph, you will notice that a large portion of the image is completely covered in shadow. This is what creates that highly desired professional look.
Clashing Studio Effects with Natural Environments
I see this specific error happening a lot with fantasy and outdoor character portraits.
Someone will describe a character walking through a deep, magical forest. But then they ask the AI for "studio portrait lighting."
The software listens to both commands. It generates a beautiful forest, but then it places invisible, bright studio softboxes right in front of the character.
The character looks totally disconnected from the background. They look like they were cut out of a magazine and pasted onto a nature wallpaper.
The light hitting the character does not match the green, filtered light coming through the trees. The brain instantly recognizes this image as fake and weird.
If your scene is outdoors, you must use natural lighting terms. Use descriptions like "dappled sunlight," "overcast sky," or "light filtering through leaves."
If you are generating a studio shot, then you can use words like "ring light" or "beauty dish." You must match the illumination style to the environment you have created.
Neglecting Environmental Bounces and Reflections
Light does not just hit an object and stop. It bounces off surfaces and carries colors with it.
If you stand next to a bright red brick wall on a sunny day, some of that red color will bounce onto your skin.
AI models are actually very good at calculating these bounces, but only if you remind them to do it. When you ignore environmental reflections, your images lose that final touch of extreme realism.
This is especially true if you are generating scenes with water, glass, or metallic surfaces.
You should experiment with words like "ambient occlusion," "global illumination," and "color bounce." These are 3D rendering terms that AI understands perfectly.
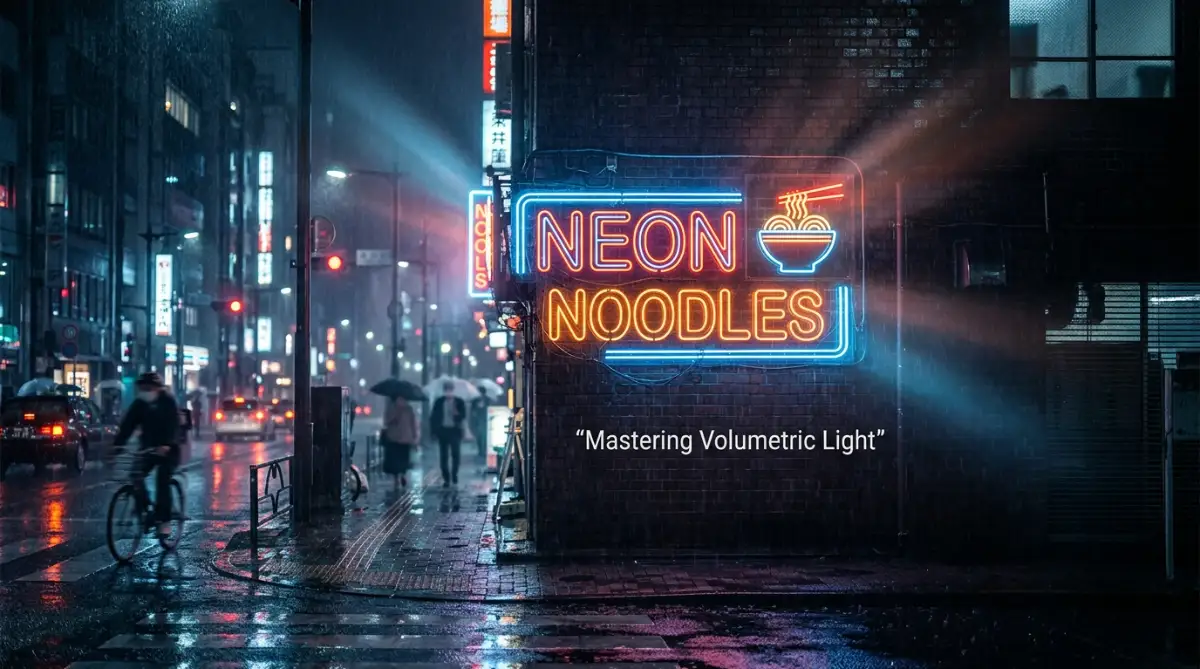
When you ask for a neon sign in a rainy street, specifically mention "neon reflections on wet pavement."
This forces the generator to draw the light interacting with the ground, rather than just floating in the air. It makes the entire scene feel connected and alive.
Using Too Many Light Sources at Once
More light does not equal a better picture. In fact, adding too many light sources is a guaranteed way to ruin your generation.
Sometimes people get overly excited and type: "sunlight, glowing neon, fairy lights, firelight, cinematic rim light."
The machine tries to include every single one of those elements. The image becomes an absolute chaotic mess of clashing colors and impossible shadows.
Your main character gets blasted with so much light that their facial features completely wash out into pure white.
A good rule of thumb is to stick to one main light source and maybe one secondary light source.
If you have a warm fire burning in the scene, let that be the main focus. You might add a cool blue moonlight coming through a window for contrast, but stop there.
Keeping your light setup simple actually produces much stronger, more visually striking results. The AI has less math to compute, so it renders the textures much more cleanly.
Overlooking the Power of Volumetric Effects
Have you ever noticed how a picture looks instantly more magical when you can actually see the beams of light in the air?
That is called volumetric lighting, and it is something most beginners completely leave out of their prompts.
When you just ask for "sunlight," you get a bright area on the floor. But when you ask for "volumetric light rays," you get those beautiful, dusty beams shining through the windows.
This effect adds an incredible amount of atmosphere to any indoor or forest scene. It gives the air a sense of thickness and reality.
You can trigger this effect by using phrases like "light beams piercing through smoke," "god rays," or "atmospheric mist."
Just make sure there is a reason for the light beams to be visible. Volumetric light needs dust, smoke, fog, or moisture in the air to work logically.
If you add a little bit of "morning fog" or "light cinematic smoke" to your description, the AI will render those glowing light rays perfectly.
The Misunderstanding of Color Temperature
Light is not just white or yellow. Every light source has a specific temperature, measured in Kelvin.
A candle gives off a very warm, orange glow. A cloudy winter sky gives off a very cool, blue tint.
If you do not specify the temperature, the AI will just guess. Often, it guesses a very neutral, boring white light that makes everything look like an office building.
You can easily control the mood of your image by describing the color of the light.
Instead of just saying "a lamp," say "a warm tungsten desk lamp." Instead of "moonlight," say "cold, eerie blue moonlight."
Contrasting these temperatures is a secret trick used by top digital artists. Putting a warm light on your character's face while keeping the background cool blue makes the subject pop right off the screen.
This simple contrast in temperature naturally draws the human eye directly to the most important part of your generated picture.
Failing to Match Light to the Subject's Mood
Finally, the biggest mistake is completely ignoring the emotional tone of the picture.
Lighting is the loudest voice in any visual story. It tells the viewer how they should feel before they even process what they are looking at.
If you are generating a sad, lonely character, you do not want bright, colorful carnival lights. You want soft, muted, low-key illumination.
If you are generating a powerful, heroic scene, you want strong, high-contrast, directional rays that make the character look larger than life.
Always ask yourself: what is the emotion of this prompt?
Once you know the emotion, choose your lighting words to support that feeling.
Soft, diffused light feels romantic and peaceful. Harsh, direct light feels intense and dramatic.
By actively avoiding these specific errors, you will immediately notice a massive upgrade in your daily generations. You will stop wasting your credits on flat, plastic faces, and start producing images that actually look like real, professional photography.
Master-Level Illumination Tricks for Flawless Renders
Now that we have covered the basic errors, it is time to take your skills to the absolute highest level. Professional photographers do not just turn on a lamp and hope for the best.
They use specific tools to shape, bend, and control the illumination in a room. You can actually use these exact same photography terms in your text commands to get mind-blowing results.
Instead of just asking for a bright room, start commanding the AI to use specific studio modifiers. For example, typing "large softbox from the top left" gives the machine a very clear mathematical boundary.
The AI knows exactly how a softbox disperses light, creating beautiful, gentle transitions on a person's skin. This is the secret to avoiding that terrible plastic look.
Another incredible trick is using real-world portrait techniques like "Rembrandt lighting." This specific setup creates a small, dramatic triangle of light on the shadowed side of your subject's cheek.
When you use established industry terms, the software immediately pulls from high-quality professional photography datasets. It stops guessing and starts acting like a master photographer.
You should also start experimenting with colored gels to add a massive amount of visual interest. Adding a phrase like "red and blue split gel lighting" forces the generator to paint with rich, contrasting colors.
This instantly makes your artwork pop off the screen and grabs the viewer's attention. Understanding how these colors blend is a huge part of decoding generative AI algorithms that power these modern tools.
The Power of Defining Light Distance and Falloff
One of my biggest breakthroughs happened when I realized I could control the distance of the light source. Light behaves very differently when it is up close compared to when it is far away.
In the real world, this is called the inverse square law. While you do not need to be a physicist, simply telling the AI that the light is "distant" or "close up" changes everything.
If you ask for a "distant street lamp," the shadows will be long, soft, and stretched out across the ground. This creates a very moody and atmospheric feeling.
If you ask for a "close proximity ring light," the shadows become sharp, dark, and immediately fall off behind the subject. This is exactly what you want for a punchy fashion portrait.
When you leave out the distance, the AI usually places the light source at an average, boring middle ground. By controlling the exact distance, you learn the basic principles of three-dimensional lighting just like professional 3D animators do.
Do's and Don'ts for Long-Term Prompting Success
To keep your artwork looking incredible every single time, you need a solid mental checklist. Here is a quick breakdown of what I do before I hit the generate button.
Do exactly this:
- Always define your primary light source before mentioning any background details.
- Use directional words (left, right, behind, above) to anchor the shadows in a logical place.
- Specify the weather or time of day if you are generating an outdoor scene.
Never do this:
- Do not stack five different lighting adjectives together and expect a clean image.
- Never ask for "bright light" and "dark shadows" in the exact same location.
- Avoid using generic words like "epic" or "awesome" to describe how a scene should be lit.
Following these simple rules will save you an unbelievable amount of frustration. It gives you a reliable system that works across every single AI tool on the market.
The Most Expensive Traps Ruining Your Daily Generations
Let me share a very painful reality about making bad choices with your text commands. Every time you write a confusing prompt, you are literally throwing your hard-earned money away.
Most of these tools run on a credit system, and burning through fifty credits to get one usable picture is a nightmare. I used to do this all the time, and it almost made me quit generating art entirely.
The biggest trap people fall into is what I call the "Floating Subject Syndrome." This happens when your character looks like they were awkwardly glued onto the background.
This usually occurs because you gave the character a completely different light setup than the environment. If your background is a dark alleyway, but your character has a bright studio flash on their face, the brain instantly rejects the image.
It looks incredibly cheap and amateurish. If you want to be taken seriously as a digital creator, you have to ensure your character actually belongs in the world you built for them.
You can easily avoid this by mastering the perfect text prompt formula and keeping your scene logically consistent.
The Plastic Skin Disaster (And How to Cure It)
Another massive pitfall is the dreaded "plastic skin" effect. You know exactly what I am talking about.
The character looks like a shiny mannequin instead of a real human being. This happens when you accidentally blast the subject with too much flat, white light.
When you do not give the AI any shadow information, it removes all the natural pores, wrinkles, and textures from the skin. The result is a smooth, glowing, terrifyingly unnatural face.
To fix this, you must introduce contrast and texture into your commands. Ask for "micro-contrast," "subsurface scattering," or "dramatic deep shadows."
These specific terms tell the AI engine to render the way real human skin absorbs and reflects light. It brings life back into your characters and makes them look human again.
Clashing Colors and Viewer Confusion
Color is a massive part of illumination, and misusing it can ruin the emotional impact of your art. If you just throw random color words into your prompt, the AI will make a messy rainbow.
Imagine trying to show a sad, lonely moment, but the scene is lit with bright pink and yellow neon signs. The viewer will feel completely disconnected from the story you are trying to tell.
Understanding how color theory impacts viewer emotion is essential for any visual artist. You have to pick colors that actually make sense for the mood.
My Personal Disaster Scenario:
I once had a paid client ask me for a series of professional corporate headshots. I got lazy and used the same generic "cinematic studio light" prompt for all of them. The AI added random orange and teal movie filters to every single photo, making the business team look like action movie villains. The client rejected the entire batch, and I had to start over from scratch.
That massive failure taught me a very important lesson. You have to adapt your lighting to the specific goal of the project.
Do not rely on the same copied and pasted prompt for every single image. What works for a fantasy dragon will absolutely destroy a corporate headshot.
This is especially true when you are trying to build a series of images that look alike. If your lighting changes wildly from picture to picture, you will completely fail at ensuring complete character consistency across your project.
Your Action Plan for Picture-Perfect AI Art
We have covered a massive amount of ground today, and I am so proud of you for sticking with me. You now know more about digital illumination than 90% of the people using these tools.
You understand that vague words are your biggest enemy, and specific photography terms are your best friends. You know how to direct the light, control the shadows, and set the perfect emotional mood.
The next step is entirely up to you. You have to actually apply these concepts the next time you sit down to create.
Do not try to memorize every single photography term at once. Just pick one new concept, like "Rembrandt lighting" or "volumetric fog," and experiment with it for an entire day.
You will be absolutely amazed by how much your images improve with just a few small tweaks. If you want to see exactly how the professionals are pushing these boundaries, I highly recommend checking out some advanced computational photography techniques used by industry leaders.
Building Your Personal Prompt Library
My best advice for long-term success is to start a private document to save your winning prompts. When you generate a lighting setup that looks absolutely stunning, copy that exact phrasing immediately.
Over time, you will build a massive library of reliable, beautiful light setups that you can use for any project. This saves you an incredible amount of time and stops you from wasting expensive credits.
This simple organizational habit is a massive step toward navigating modern digital careers successfully. Being organized and efficient is what separates the hobbyists from the professionals.
If you are ever feeling stuck, just take a walk outside and look at how the real sun interacts with the trees and buildings. The real world is the greatest reference guide you will ever find.
I am so excited to see the incredible art you are going to create with these new skills. If you want to keep exploring the best tools on the market, feel free to check out our main hub for exploring cutting-edge digital resources anytime you need inspiration.
I genuinely hope this guide has removed the frustration from your creative process. Keep practicing, stay curious, and never stop experimenting with your ideas!
Quick Answers to Your Biggest AI Lighting Questions
Why do my AI images always look so fake and plastic?
This usually happens because your prompt lacks directional shadows and relies on generic words like "bright light." Without shadows, the AI smooths out all the natural textures, making skin and objects look completely flat. Adding terms like "high contrast" or "deep shadows" easily fixes this problem.
What is the best lighting word to use for Midjourney?
There is no single "best" word, but using specific photography terms always yields the highest quality results. Words like "dappled sunlight," "studio softbox," or "volumetric lighting" give the engine clear, mathematical instructions. Avoid empty adjectives like "beautiful" or "epic."
How do I fix weird, messy shadows in my AI art?
Messy shadows happen when you ask the generator to include too many different light sources in one scene. The AI gets confused trying to calculate sunbeams, neon lights, and firelight all at once. Stick to one main light source and one subtle background light for clean, realistic shadows.
Can AI generators actually understand real photography terms?
Yes, absolutely! The models were trained on millions of professionally tagged photographs from the internet. They heavily associate terms like "focal length," "golden hour," and "rim lighting" with extremely high-quality, realistic output.
How do I make my character blend into the background properly?
You have to make sure the light hitting your character logically matches the environment they are standing in. If they are in a dark forest, ask for "filtered green canopy light" instead of "studio portrait flash." This creates a cohesive, believable image that tricks the human eye.
Disclaimer: This article is for informational and educational purposes only. The strategies and tips shared are based on personal experience and general industry practices regarding artificial intelligence tools. Results may vary depending on the specific AI software, updates, and user application. We are not responsible for any wasted subscription credits or undesired generations. Always review the terms of service of the specific AI platforms you are using.
THANK YOU